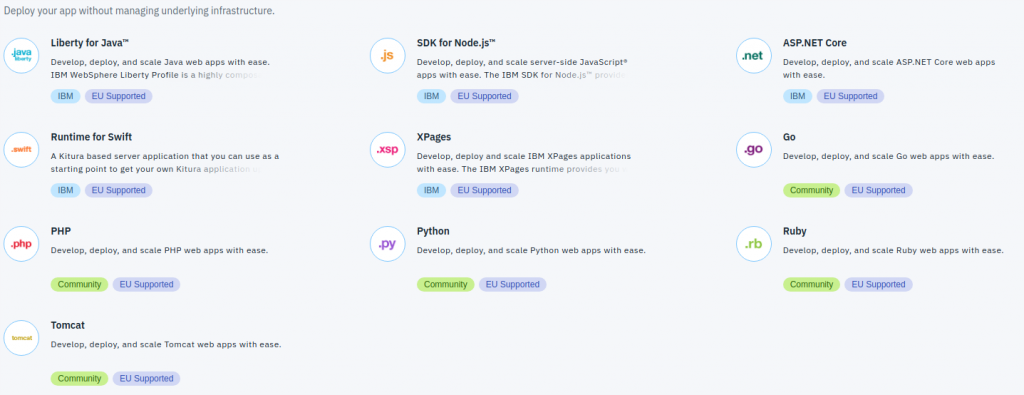
In this blog post, I will describe how to deploy the CloudEE Duke application packaged in a Liberty über-jar to Oracle Application Container Cloud.
The deployment artifact required for deployment in Oracle Application Container Cloud is a ZIP archive containing the application über-jar and a manifest file (manifest.json). The Liberty version of the manifest.json for CloudEE Duke is listed below.
{
    "runtime": {
        "majorVersion": "8"
    },
    "command": "java -jar cloudee-duke.jar",
    "release": {
        "version": "1.0",
        "build": "1",
        "commit": "123"
    },
    "notes": "Dukes says hello from Liberty"
}
You need to specify the port for Liberty to use. This cam be done by configuring it in the server.xml using the environment variable ${env.PORT} as shown here:
<server description="Sample Liberty server">
    <featureManager>
        <feature>microprofile-1.2</feature>
    </featureManager>

    <httpEndpoint  httpPort="${env.PORT}"
                   httpsPort="9443"
                   id="defaultHttpEndpoint"
                   host="*" />

    <quickStartSecurity userName="duke" userPassword="duke"/>

    <keyStore id="defaultKeyStore" password="Liberty"/>
</server>
The über-jar is produced by using a combination of the Maven Resources Plugin as well as the Liberty Maven Plugin:
<plugin>
    <groupId>org.apache.maven.plugins</groupId>
    <artifactId>maven-resources-plugin</artifactId>
    <version>3.0.2</version>
    <executions>
        <execution>
            <id>copy-app</id>
            <phase>package</phase>
            <goals>
                <goal>copy-resources</goal>
            </goals>
            <configuration>
                <outputDirectory>${project.build.directory}/liberty/wlp/usr/servers/defaultServer/dropins</outputDirectory>
                <resources>
                    <resource>
                        <directory>${project.build.directory}</directory>
                        <includes>
                            <include>${project.build.finalName}.war</include>
                        </includes>
                    </resource>
                </resources>
            </configuration>
        </execution>
    </executions>
</plugin>
<plugin>
    <groupId>net.wasdev.wlp.maven.plugins</groupId>
    <artifactId>liberty-maven-plugin</artifactId>
    <version>2.2</version>
    <extensions>true</extensions>
    <configuration>
        <install>
            <type>webProfile7</type>
            <version>2018.+</version>
        </install>
        <configFile>${basedir}/src/main/liberty/config/server.xml</configFile>
        <serverEnv>${basedir}/src/main/liberty/config/server.env</serverEnv>
        <jvmOptionsFile>${basedir}/src/main/liberty/config/jvm.options</jvmOptionsFile>
        <packageFile>${project.build.directory}/${project.build.finalName}.jar</packageFile>
        <include>runnable</include>
    </configuration>
    <executions>
        <execution>
            <id>install-liberty</id>
            <phase>prepare-package</phase>
            <goals>
                <goal>install-server</goal>
            </goals>
        </execution>
        <execution>
            <id>package-app</id>
            <phase>package</phase>
            <goals>
                <goal>package-server</goal>
            </goals>
        </execution>
    </executions>
</plugin>
See the complete pom.xml for an example on how to produce the deployable ZIP archive with the maven command:
mvn clean package assembly:single -Pliberty
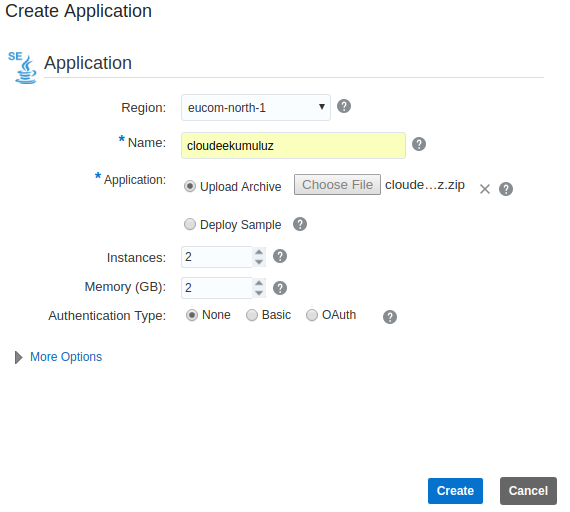
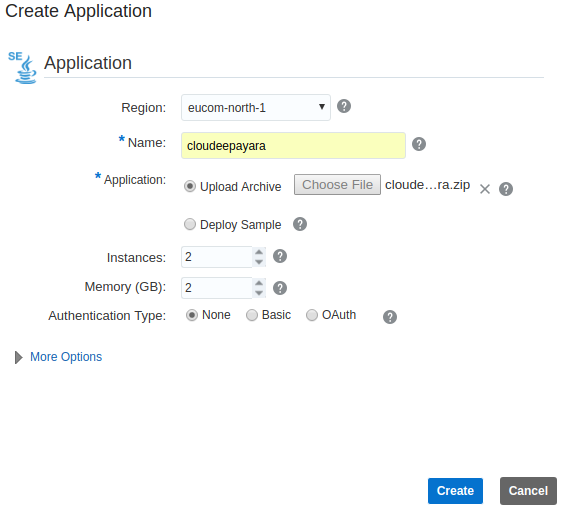
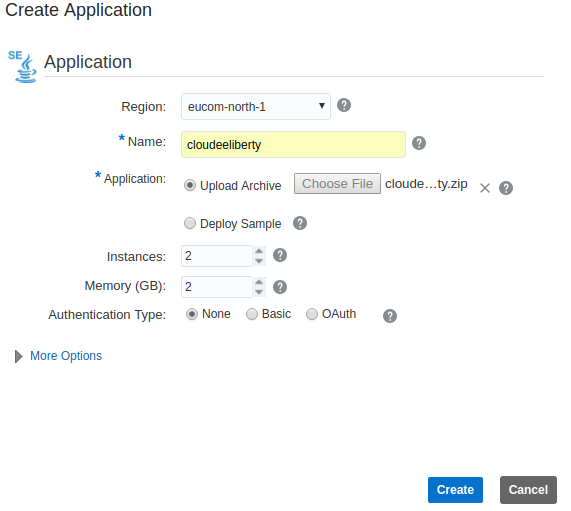
This will produce a file called cloudee-duke-oracle-liberty.zip in the target folder. This is the ZIP archive you will deploy to Oracle Application Container Cloud as shown in the screenshot below.
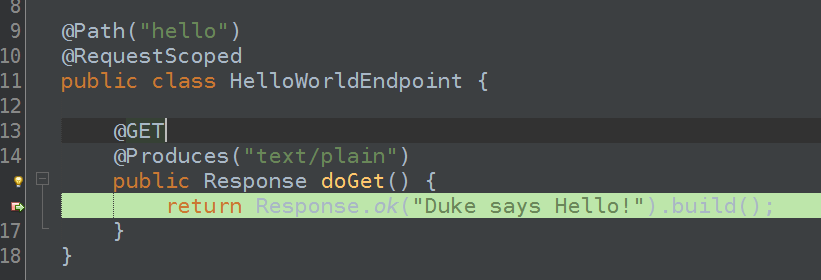
When your application is deployed, you should be able to access the hello endpoint
https://<dependsonyouraccount>.oraclecloud.com/hello
Duke says Hello!
You will also have the health and metrics endpoints provided by the MicroProfile implementation
https://<dependsonyouraccount>.oraclecloud.com/health
{
outcome: “UP”,
checks: [ ]
}
https://<dependsonyouraccount>.oraclecloud.com/metrics
# TYPE base:classloader_total_loaded_class_count counter
# HELP base:classloader_total_loaded_class_count Displays the total number of classes that have been loaded since the Java virtual machine has started execution.
base:classloader_total_loaded_class_count 9430
# TYPE base:cpu_system_load_average gauge
…